Note to self, do not start a 2 part blog post during a pandemic.
Sorry this took a while - I was prioritising work, my workshop and (quite frankly) my mental health.
If anyone is still even remotely interested - let's crack on. 😊
So, this is where we left off. We'd learnt how to get the x and y coordinates from our mouse, map them to a useable range and then use those values to animate this pointer.
See the Pen Mouse movement demo - GSAP - easing by Cassie Evans (@cassie-codes) on CodePen.
We've done all the hard work already - all that's left is to plug those values into an SVG and create some 'faux-3D' movement.
The fun bit! permalink
We're not going to be changing much of this code. We'll just be applying the values from the mouse movement to elements inside an SVG instead of the pointer.
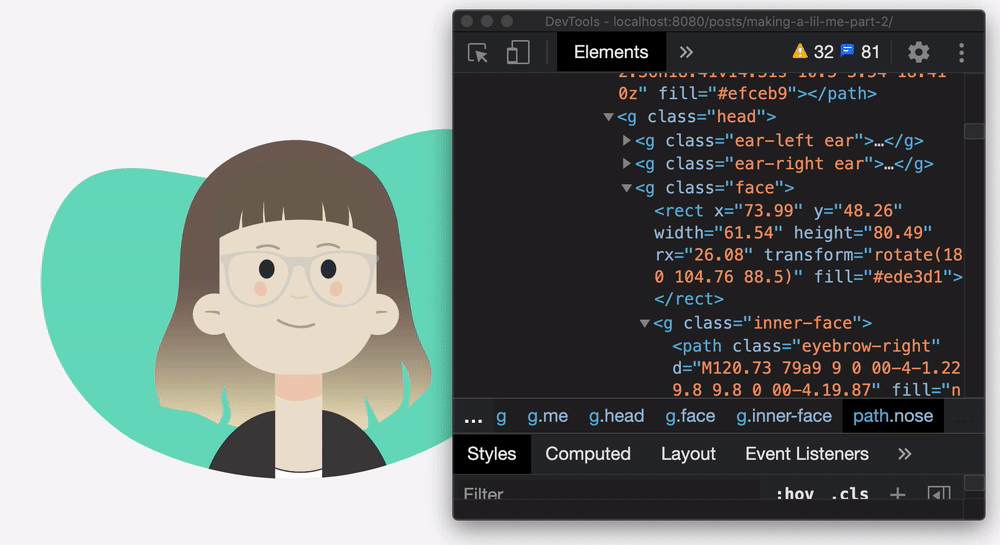
SVG code can be hella lengthy and messy to look at though - so here's a little example of what we have inside the SVG.
<svg viewBox="0 0 200 200">
  <g class="ears">
    <path class="ear-left" d="M63....z" />
    <path class="ear-right" d="M68.54..." />
  </g>
  <path class="face" d="M124..." />
  <g class="inner-face">
    <path class="glasses" d="M133...." />
    <path class="eye-left" d="M124..." />
    <path class="eye-right" d="M174..." />
  </g>
</svg>
It's basically lots of paths and shapes that make up different parts of the graphic. This is the cool thing about SVG, unlike JPG's or PNG's you can get inside an SVG and manipulate different parts of it with code. SVG's even have a DOM, just like HTML. - Check this out.
 Hey look. I have a fringe now.
We'll animate the SVG elements in the same way we did the pointer. Using a GreenSock tween. (We could use CSS variables as we did in part 1.)
Whether you use CSS or JS for the animation - The trick to 'fake' 3D movement is to create an illusion of perspective by moving the parts of the face in the background slightly less than the bits in the foreground.
The x and y values here are the values we got in part 1 – a range between -50 and 50.
The adjusted face range will be moving the face background very slightly by 1.6% of it's height and width, whereas the inner face will be moving a little more 8.3% of it's width and height.
// the face itself
// adjusted range of -1.6 to 1.6
gsap.to('#face', {
  xPercent: x / 30,
  yPercent: y / 30
});

// glasses, eyebrows, cheeks and stuff
// adjusted range of -8.3 to 8.3
gsap.to('#innerFace', {
  yPercent: y / 6,
  xPercent: x / 6
});
A little tip. permalink
You can pass the DOM element itself straight into a GSAP tween, but when I'm animating stuff that'll be updating frequently, like mouse reactive animation, I tend to assign the elements to variables so that the DOM is hit less. It's only a small performance gain - but small wins are important with animation!
// Get the elements that we need
const dom = {
  face: document.querySelector('.face'),
  eye: document.querySelectorAll('.eye'),
  innerFace: document.querySelector('.inner-face'),
  hairFront: document.querySelector('.hair-front'),
  hairBack: document.querySelector('.hair-back'),
  ear: document.querySelectorAll('.ear'),
  eyebrowLeft: document.querySelector('.eyebrow-left'),
  eyebrowRight: document.querySelector('.eyebrow-right')
};
And that's the lot!
Here's the final pen with some adjusted values for the different bits of the face - There's no clever maths here - I just tweaked until it looked and 'felt' right.
Have a go at tweaking the values. Breaking stuff is the best way to learn!
See the Pen lil' me. - demo version by Cassie Evans (@cassie-codes) on CodePen.
Got any questions about this post? Just pop me a message!